This post explains how to:
- Take a facial portrait and detect the position of the face
- Cut a facial portrait down the center and remove half of the picture so that kids can fill it in themselves.
- Print a massive amount of JPEGs at once by putting them in a PDF.
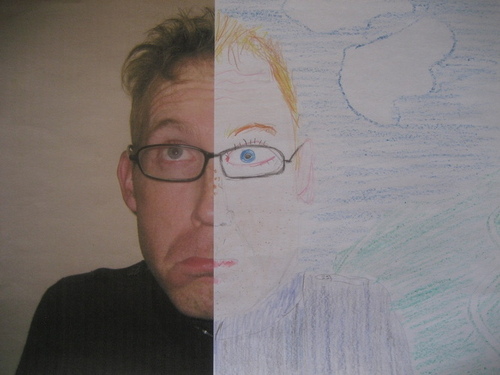
I’m in the Eastern Cape, South Africa now, working with orphans and vulnerable children. Alex and I are spending some of our time on art projects in remote rural areas, and one of the projects is an idea we stole from an orphanage in Cape Town: take a digital portrait of a child’s face, crop it down the center, print it and let them draw the other side of the face. Like this one Alex did:

The first time we did this, we went out to the rural area, took pictures of about 16 kids and then spent an hour or two processing the pictures and printing. The processing involved:
- Importing the pictures to Picassa, straightening some of them and cropping others. (Yes, I know Picassa is not Free/Libre, but F-spot (in Ubuntu Hardy) is dog slow to display pictures and doesn’t have the straighten function).
- Exporting to a directory, then opening each file in GIMP and cropping the right-or-left hand side of the face away.
- Combine all the JPEG images into a PDF so they’re easy to print.
The second time, we did the project at a school, for 60+ pupils. The straightening/cropping in Picassa took about ten minutes (since most of the pictures didn’t need much work). The open-crop-save-close process in GIMP took about thirty seconds per picture and was both repetitive and highly mouse intensive so that we both got hand cramps after a while.
So, after watching Alex do the process for a second class at the school, I decided there must be a better way: automatic face detection. Lo-and-behold, five minutes of Googling got me to Torch3Vision, an image recognition toolkit with built-in face detection. It definitely works, but it takes quite a little setting up, so here’s a guide.
- Download Torch3Vision and un-tar it: tar -zxf Torch3vision2.1.tgz
- Build Torch3vision: cp Linux_i686.cfg.vision2.1 Linux_i686.cfg ./torch3make
- Build the vison examples for face detection:cd vision2.1/examples/facedetect/
../../../torch3make *.cc
So now we have a working set of face-detection programmes. The command line interface isn’t too friendly, so they take a little playing around. For starters, the binaries on my Ubuntu system don’t read JPEG images (although the code seems to be there, the build system is non-standard and didn’t automatically pick up my jpeg libraries. So, I needed to convert my images to PPM format, which is one of those image formats that no-one uses but somehow is the lowest common denominator for image processing command line apps. I use the program ‘jpegtopnm’ from package ‘netpbm’.
jpegtopnm andy.jpg > andy.ppmOf the three facial detection programs available, I found ‘mlpcascadescan’ to be the most effective and quickest, although they all have similar interfaces so this will basically be the same for all of them. We need to pass the source image and the model file, and we tell it to write the face position and to save a drawing with the face detected:
mlpcascadescan andy.ppm -savepos -draw \-model ~/temp/models/mlp-cascade19x19-20-2-110
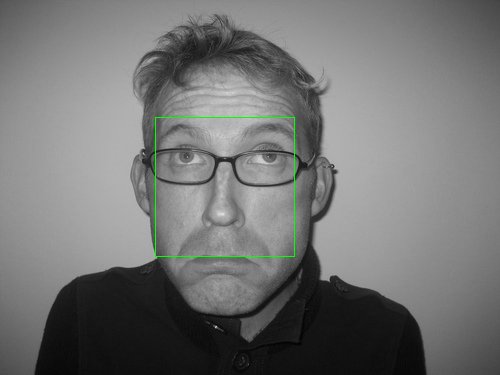
This command takes about 20s to run on my creaky old laptop, and creates two files. One is a greyscale visualization of the face detected (the original image was colour):

The other file ‘andy.pos’ contains the results of face detection. Line one is the number of detections, then each line has format x y w h, very easy to parse.
FACE_POS=`head -n 2 “andy.pos | tail -n 1`FACE_X=`echo $FACE_POS | awk ‘{print $1}’`
FACE_W=`echo $FACE_POS | awk ‘{print $3}’`
FACE_CENTER=`echo $FACE_X + $FACE_W/2 | bc`
I played around with the step-factors in the x and y directions to shave a second or so off the face detection routine, the values I chose were 0.1 and 0.2 respectively (I don’t need any accuracy in the y direction really, since my use is to cut the face down the middle).
Then, since these are portrait photographs, I can speed up face detection by setting a minimum size for the face. I experimented and one sixth of the total image width gave good results – any larger and the face detection would fail with a crash. Adding this constraint provides better than 10X speed up, since the algorithm doesn’t waste time searching for small faces.
WIDTH=`identify -format “%w” “andy.jpg”`MIN_FACE_WIDTH=`echo $WIDTH / 6 | bc`
So now here’s the final face detection command
mlpcascadescan “$ppm” -dir /tmp/ -savepos -model $MODEL \-minWsize $MIN_FACE_WIDTH -stepxfactor $STEPX -stepyfactor $STEPY
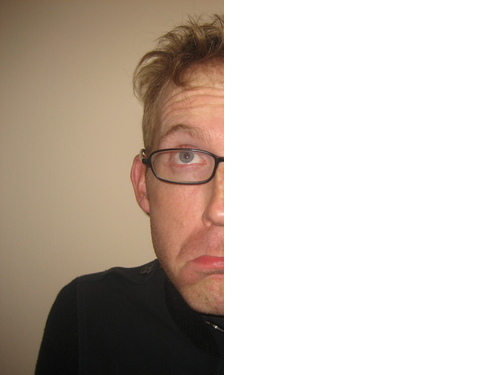
And finally, as promised, I’ll tell you how to blank-out one side of the face: of course, using Image Magick. Using the ‘chop’ or ‘crop’ commands didn’t work for this purpose, where I wanted the image to keep it’s dimensions but have one half just be white. So I decided to draw a white rectangle over half of the picture. I apply the image manipulation to the original JPEG file, not the temporary PPM file that I used to detect the face position.
convert -fill white \-draw “rectangle $FACE_CENTER,0 $WIDTH,$HEIGHT” \
“andy.jpg” “andy_half.jpg”
The script I am using to tie this all together.
After processing all the portraits, I run a quick script to convert the jpegs to PDF and then join them into one master PDF file that I can easily print. The JPEG-PDF conversion uses Image Magick again (convert -rotate 90 file.jpg file.pdf). Joining together many PDFs into one document is easy with ‘pdfjoin’ from package ‘pdfjam’ (pdfjoin $tempfiles –outfile jpg2pdf.pdf). See the final jpg2pdf script.
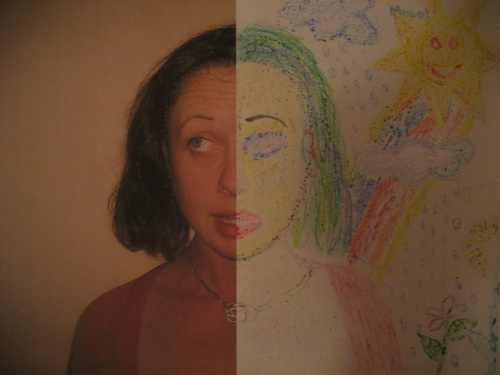
But perhaps more enjoyable is to see the result after letting my limited creative talents loose:


4 replies on “Command-line face detection”
I am looking for some idea and stumble upon your posting :) decide to wish you Thanks. Eugene
After jumping through about 50 hoops, I finally got it to compile with JPEG support. It requires manual editing of the Makefile in the vision2.1 directory and merging a little bit of the “Full” example with the “Basic” example makefile. It should be pretty evident if you look at the files carefully. (I realize you’ve probably moved on already, but somebody that needs to do something similar will find this post and hopefully get pointed in the right direction, too…)
This is great! I didn’t know face detection would be this easy to set up. Thanks for doing all the hard work for me :)
Stu, this is great and very useful. Would you mind sharing the JPG stuff too? ;-)